Showing posts with label raspberrypi. Show all posts
How to share Windows internet to Raspberry Pi through Ethernet port. In this tutorial you'll learn how to share your Laptop's internet to Raspberry Pi using an Ethernet cable.


What you need:

Ethernet cable
Ensure your Raspberry pi Ethernet has no Static IP

Step 1: Find Raspberry Pi Hostname

hostname
The default hostname is raspberrypi. The complete name will be raspberrypi.local

Step 2: Configure your Laptop

Go to your Laptop and open Network Connections and ensure your Ethernet adapter set to automatically obtain IP Address


Share your Laptop's wifi internet


Step 3: Connect to Raspberry Pi using Putty

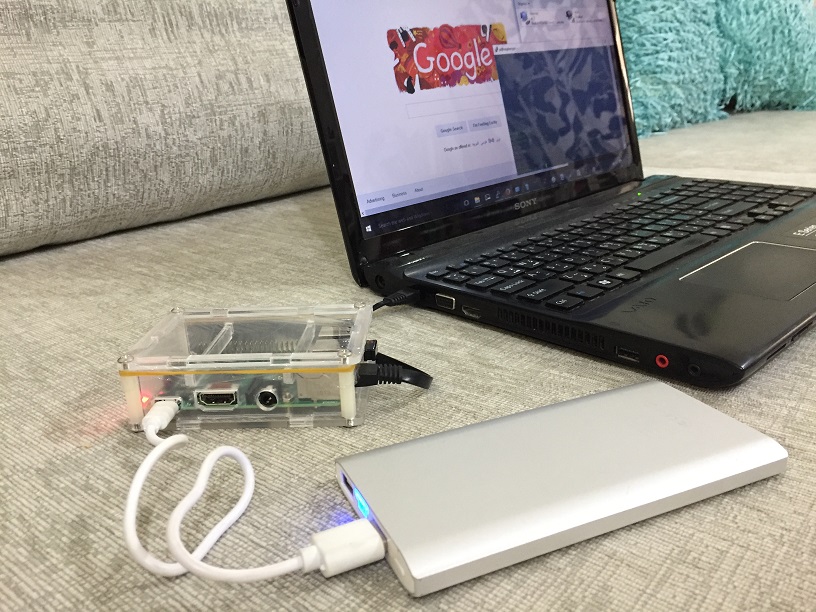
Plug the Ethernet cable to your Laptop and the other end is to your Raspberry Pi Ethernet port

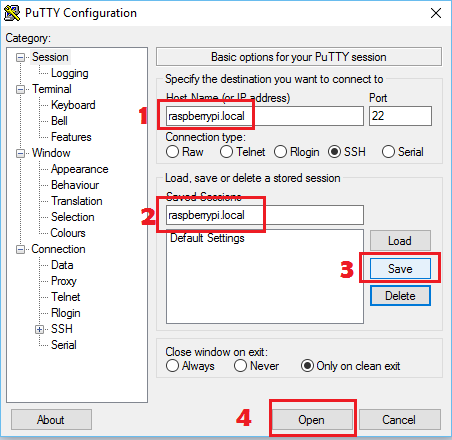
Open Putty and type the hostname of your Raspberry Pi and add .local at the end. In my RasPi its raspberrypi.local


Login to your raspberry pi using the details below:
Username: pi
Password: raspberry

Finally, check if it has internet connection:
sudo apt-get update

End of tutorial

Kyle Abad


How to share your iPhone's internet to your local network (LAN) using a Raspberry Pi. This project will make your Raspberry Pi your personalized home router that shares your iPhone internet (or any mobile device) to your Home Network so your Smart TV, Apple TV, Laptop and other devices can connect to the internet by wireless or by Ethernet cable.

About my Raspberry Pi:
  • Raspberry Pi 3
  • Noobs updated
What you'll need:

Step 1: Configure the Ethernet Interface

We have to assign a static IP 192.168.1.1 for Raspberry Pi Ethernet adapter.
To do this, open your terminal and type:
sudo nano /etc/dhcpcd.conf
Add this on the last line
denyinterfaces eth0
Save and exit (Press ctrl + o to save and ctrl +x to exit)

Open interfaces by typing:
sudo nano /etc/network/interfaces

and add this code on the last:
auto eth0
allow-hotplug eth0
iface eth0 inet static
    address 192.168.1.1
    netmask 255.255.255.0
    network 192.168.1.0
    broadcast 192.168.1.255
Save and exit

STEP 2: CONFIGURING DHCP service (dnsmasq)
We will configure the DHCP service so your Raspberry Pi will automatically assign IP for every device plugged in the Ethernet Port.
sudo mv /etc/dnsmasq.conf /etc/dnsmasq.conf.orig  
sudo nano /etc/dnsmasq.conf

Add this code
interface=eth0
listen-address=192.168.1.1
dhcp-range=192.168.1.50,192.168.1.100,12h
server=8.8.8.8
bind-interfaces
domain-needed
bogus-priv
Save and exit

Reboot your device
sudo reboot

USING PUTTY TO CONFIGURE RASPBERRY
Ensure your Laptop Ethernet adapter setting is set to auto obtain IP address. Plug your Ethernet cable to your Raspberry Pi and the other end to your Laptop Ethernet port. Your Laptop should get IP address assigned by your Raspberry.


Now open Putty and type 192.168.1.1(Raspberry Pi IP Address) in Host Name, type any name you like in Save Sessions, click Save and finally click Open.

It will ask you a username and password every time you log in to Raspberry. Use the details below:
Username: pi
Password: raspberry

From here we will use Putty to configure the Raspberry Pi


 STEP 3: Configuring Wifi interface

In this step, we will configure the Wifi setting for the Raspberry to be able to connect to a wifi network. 
sudo nano /etc/network/interfaces

Useful tip: You can just copy codes from your browser and paste it to putty by pressing right click of your mouse inside the putty window.

Paste this code at the end of the line.
auto wlan0
allow-hotplug wlan0
iface wlan0 inet manual
wpa-conf /etc/wpa_supplicant/wpa_supplicant.conf
Save and exit

Set the Wifi password
sudo nano /etc/wpa_supplicant/wpa_supplicant.conf

Paste this code and edit the ssid (iPhone hotspot name) and psk (wifi password)
ctrl_interface=DIR=/var/run/wpa_supplicant GROUP=netdev
update_config=1
country=GB

network={
        ssid="***iPhone hotspot name***"
        psk="***Wifi password**"
        key_mgmt=WPA-PSK
}
Save and exit

Reboot your Raspberry pi
sudo reboot

Check if your Wifi is connected and has internet connection
sudo apt-get update
If it download and update, it means you have internet

STEP 4: SHARING THE INTERNET

 We have to forward the internet connection we got from Wifi to the Ethernet port where our laptop is connected.

Setup IPv4 Forwarding:
sudo nano /etc/sysctl.conf

Un-comment this line by removing #
net.ipv4.ip_forward=1
And lets activate it
sudo sh -c "echo 1 > /proc/sys/net/ipv4/ip_forward"

Lets reset the IP table. Write a script in a file named tablereset.sh
nano tablereset.sh

Paste this code:
#!/bin/sh
echo "Resetting the IP Tables"
ipt="/sbin/iptables"
## Failsafe - die if /sbin/iptables not found 
[ ! -x "$ipt" ] && { echo "$0: \"${ipt}\" command not found."; exit 1; }
$ipt -P INPUT ACCEPT
$ipt -P FORWARD ACCEPT
$ipt -P OUTPUT ACCEPT
$ipt -F
$ipt -X
$ipt -t nat -F
$ipt -t nat -X
$ipt -t mangle -F
$ipt -t mangle -X
$ipt -t raw -F 
$ipt -t raw -X
Save and exit

And run the script
sudo sh tablereset.sh

Add firewall rules, paste the code below one at a time:
sudo iptables -t nat -A POSTROUTING -o wlan0 -j MASQUERADE

sudo iptables -A FORWARD -i wlan0 -o eth0 -m state --state RELATED,ESTABLISHED -j ACCEPT

sudo iptables -A FORWARD -i eth0 -o wlan0 -j ACCEPT

Check the changes we made:
sudo iptables -L -n -v

Save the rules we made
sudo sh -c "iptables-save > /etc/iptables.ipv4.nat"

Lets make this rules loaded automatically every time the system reboot.
sudo nano /etc/rc.local

Paste this code before "exit 0"
iptables-restore < /etc/iptables.ipv4.nat 
Save and exit
Let check the Firewall setting:
route
Here is the Routing table in my Raspberry
pi@raspberrypi:~ $ route
Kernel IP routing table
Destination     Gateway         Genmask         Flags Metric Ref    Use Iface
default         172.20.10.1     0.0.0.0         UG    303    0        0 wlan0
172.20.10.0     *               255.255.255.240 U     303    0        0 wlan0
192.168.1.0     *               255.255.255.0   U     0      0        0 eth0

Let check if this works. Ensure your Raspberry pi is connected to your laptop Ethernet port and Raspberry pi is connected to your iPhone Hotspot. Disconnect your laptop from any Wifi connection. Then browse any website and see if it works.

Step 5: Configuring your router

Your router maybe different from mine. This step don't cover much details. But two thing you must do to your router:

1. Dhcp should be disabled
2. It should not have IP the same as your Raspberry Pi.

If Raspberry Pi and Router has the same IP address (192.168.1.1), it is conflict and will not work. Also only one Dhcp service should run in the network. So ensure the router has no Dhcp running. Remember we configured the Raspberry Pi Dhcp service.
Once all are configure and checked, devices connected through Ethernet cable or through wifi should work.

-Mylinuxcode
 
Share your Raspberry Pi internet from Wifi to Ethernet Adapter. This project will make Raspberry Pi your personalized router. It translate the internet connection you get from maybe hotel's internet to your home network.


About my Raspberry Pi:
  • Raspberry Pi 3
  • Noobs updated
What you'll need:
  • Wifi name and password
  • Ethernet cable
  • Putty

Step 1: Configure the Ethernet Interface

We have to assign a static IP 192.168.1.1 for Raspberry Pi Ethernet adapter.
To do this, open your terminal and type:
sudo nano /etc/dhcpcd.conf
Add this on the last line
denyinterfaces eth0
Save and exit (Press ctrl + o to save and ctrl +x to exit)

Open interfaces by typing:
sudo nano /etc/network/interfaces

and add this code on the last:
auto eth0
allow-hotplug eth0
iface eth0 inet static
    address 192.168.1.1
    netmask 255.255.255.0
    network 192.168.1.0
    broadcast 192.168.1.255
Save and exit

STEP 2: CONFIGURING DHCP service (dnsmasq)
We will configure the DHCP service so your Raspberry Pi will automatically assign IP for every device plugged in the Ethernet Port.
sudo mv /etc/dnsmasq.conf /etc/dnsmasq.conf.orig  
sudo nano /etc/dnsmasq.conf

Add this code
interface=eth0
listen-address=192.168.1.1
dhcp-range=192.168.1.50,192.168.1.100,12h
server=8.8.8.8
bind-interfaces
domain-needed
bogus-priv
Save and exit

Reboot your device
sudo reboot

USING PUTTY TO CONFIGURE RASPBERRY
Ensure your Laptop Ethernet adapter setting is set to auto obtain IP address. Plug your Ethernet cable to your Raspberry Pi and the other end to your Laptop Ethernet port. Your Laptop should get IP address assigned by your Raspberry.


Now open Putty and type 192.168.1.1(Raspberry Pi IP Address) in Host Name, type any name you like in Save Sessions, click Save and finally click Open.

It will ask you a username and password every time you log in to Raspberry. Use the details below:
Username: pi
Password: raspberry

From here we will use Putty to configure the Raspberry Pi


 STEP 3: Configuring Wifi interface

In this step, we will configure the Wifi setting for the Raspberry to be able to connect to a wifi network. 
sudo nano /etc/network/interfaces

Useful tip: You can just copy codes from your browser and paste it to putty by pressing right click of your mouse inside the putty window.

Paste this code at the end of the line.
auto wlan0
allow-hotplug wlan0
iface wlan0 inet manual
wpa-conf /etc/wpa_supplicant/wpa_supplicant.conf
Save and exit

Set the Wifi password
sudo nano /etc/wpa_supplicant/wpa_supplicant.conf

Paste this code and edit the ssid (wifi name) and psk (wifi password)
ctrl_interface=DIR=/var/run/wpa_supplicant GROUP=netdev
update_config=1
country=GB

network={
        ssid="***HERE IS YOUR WIFI ID***"
        psk="***HERE IS THE WIFI PASSWORD**"
        key_mgmt=WPA-PSK
}
Save and exit

Reboot your Raspberry pi
sudo reboot

Check if your Wifi is connected and has internet connection
sudo apt-get update
If it download and update, it means you have internet

STEP 4: SHARING THE INTERNET

 We have to forward the internet connection we got from Wifi to the Ethernet port where our laptop is connected.

Setup IPv4 Forwarding:
sudo nano /etc/sysctl.conf

Un-comment this line by removing #
net.ipv4.ip_forward=1
And lets activate it
sudo sh -c "echo 1 > /proc/sys/net/ipv4/ip_forward"

Lets reset the IP table. Write a script in a file named tablereset.sh
nano tablereset.sh

Paste this code:
#!/bin/sh
echo "Resetting the IP Tables"
ipt="/sbin/iptables"
## Failsafe - die if /sbin/iptables not found 
[ ! -x "$ipt" ] && { echo "$0: \"${ipt}\" command not found."; exit 1; }
$ipt -P INPUT ACCEPT
$ipt -P FORWARD ACCEPT
$ipt -P OUTPUT ACCEPT
$ipt -F
$ipt -X
$ipt -t nat -F
$ipt -t nat -X
$ipt -t mangle -F
$ipt -t mangle -X
$ipt -t raw -F 
$ipt -t raw -X
Save and exit

And run the script
sudo sh tablereset.sh

Add firewall rules, paste the code below one at a time:
sudo iptables -t nat -A POSTROUTING -o wlan0 -j MASQUERADE

sudo iptables -A FORWARD -i wlan0 -o eth0 -m state --state RELATED,ESTABLISHED -j ACCEPT

sudo iptables -A FORWARD -i eth0 -o wlan0 -j ACCEPT

Check the changes we made:
sudo iptables -L -n -v

Save the rules we made
sudo sh -c "iptables-save > /etc/iptables.ipv4.nat"

Lets make this rules loaded automatically every time the system reboot.
sudo nano /etc/rc.local

Paste this code before "exit 0"
iptables-restore < /etc/iptables.ipv4.nat 
Save and exit
Let check the Firewall setting:
route
Here is the Routing table in my Raspberry
pi@raspberrypi:~ $ route
Kernel IP routing table
Destination     Gateway         Genmask         Flags Metric Ref    Use Iface
default         192.168.2.1     0.0.0.0         UG    304    0        0 wlan1
192.168.1.0     *               255.255.255.0   U     0      0        0 eth0
192.168.2.0     *               255.255.255.0   U     304    0        0 wlan1

Let check if this works. Ensure your Raspberry pi is connected to your laptop Ethernet port and Raspberry pi is connected to a Wifi that has internet. Disconnect your laptop from any Wifi connection. Then browse any website and see if it works.

If you plan to connect your Rapsberry Pi Ethernet to a router, please consider these two important points:
  1. The Router IP address should not be 192.168.1.1
  2. The Router Dhcp service should be disabled
If Raspberry Pi and Router has the same IP address, it will not work. Also only one Dhcp service should run in a network. So ensure the router has no Dhcp running. Remember we configured the Raspberry Pi Dhcp service.


How to install Raspberry Pi operating system Noobs. In this tutorial, we will going to use a Windows 7 computer. You can also watch the video of this tutorial.


What you'll need:

Step 1:
Download the Noobs image from their website. Later at step 4, you have to extract this file, copy and paste all extracted files on your SD card.

Step 2: 
Download the SD Card Formatter and install it to your computer. Run the software after installation.

Step 3:
Insert your SD card in your computer. Select the drive letter of your SD card. Remember, this process will wipe out your SD card files. Once ready, click format button.

Step 4: 
Extract the Noobs image file. Copy all the extracted files (shown below image) and paste it all on your SD card (root directory).


Step 5: 
Remove your SD card from your computer and insert it in your Raspberry Pi. Please ensure that you have a good power supply for Raspberry. The device require 5 volts with 1amps or more (2amps is recommended.) Use a high quality usb cable in order for your Raspberry pi works properly. Tablet chargers are good choice. Plug your usb charger to power up the raspberry pi.

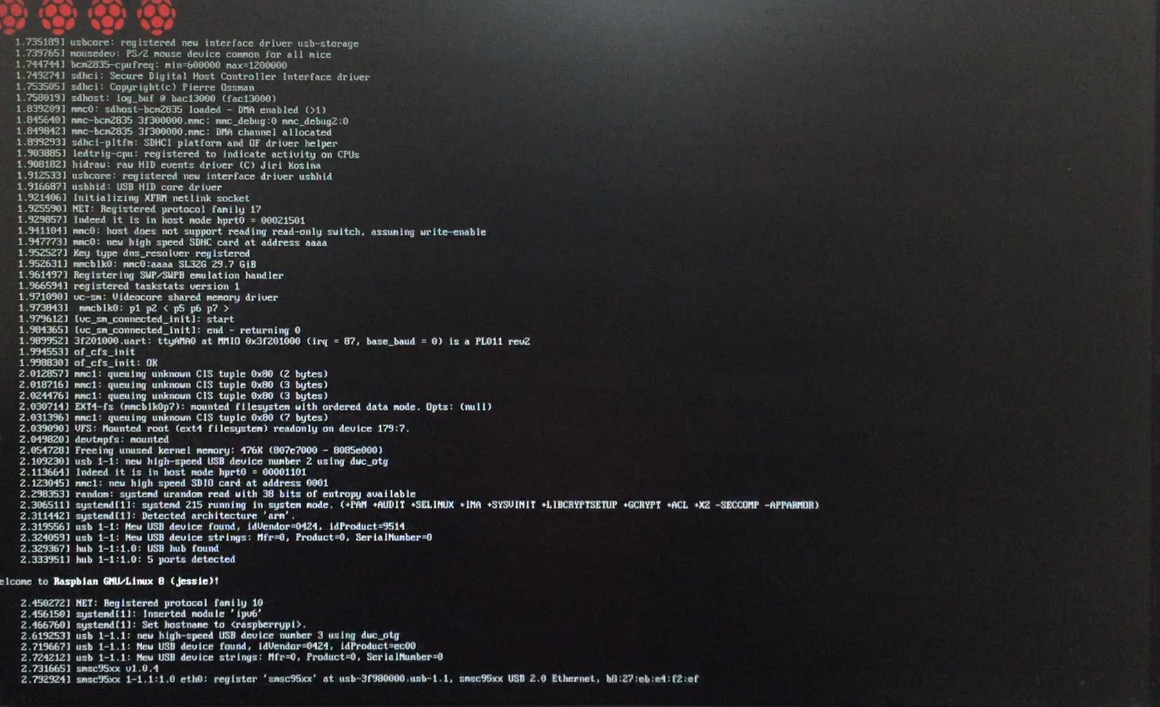
This screen shows your raspberry and sd card works.
If your screen doesnt show anything, it may have power shortage problem or SD card has no properly installed operating system.

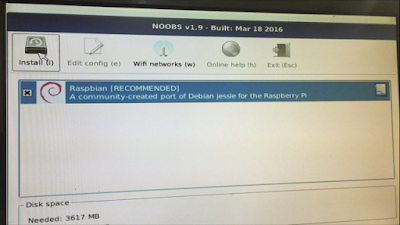
Select or tick the Raspbian and click Install

Click yes to proceed the installation. This may took more than 8 minutes of installation
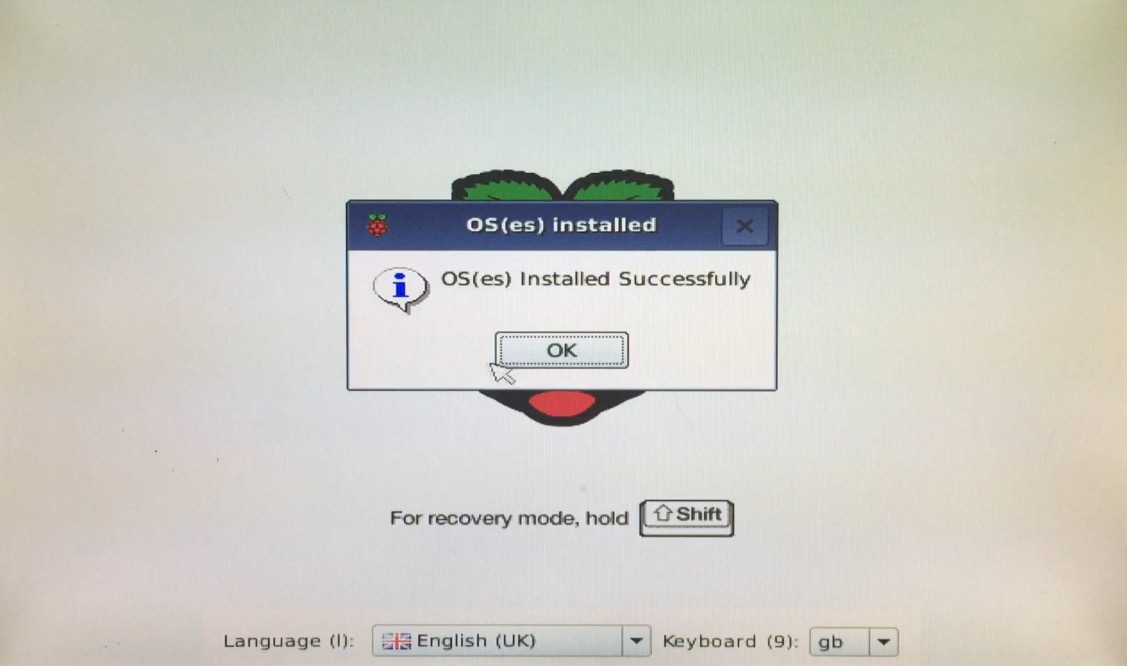
Click Ok and the system will restart
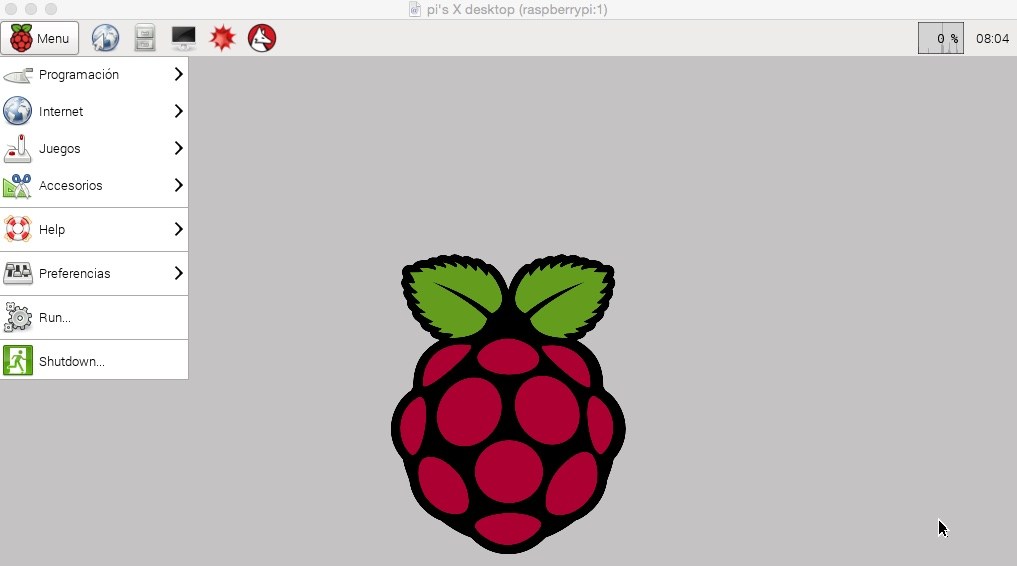
This is your Raspberry pi Noobs desktop environment

Step 6:
Update your system by pressing ctrl+alt+t to open the Terminal. Type the following command

sudo apt-get update

sudo apt-get upgrade

Congratulation! You have your Raspberry Pi with NOOBS desktop environment.
Copyright © 2012 My Linux Code